
Greetings, readers. Tanis here.
If you’ve ever taken a class with me, you know that I can get obsessed carried away when I talk about the importance of blocking. I preach on and on about how you should block EVERYTHING, but blocking is imperative when it comes to lace shawls. A lace shawl can be a simple, quick knit, or you can chose a pattern that’s hardcore and demands all of your attention when knitting it. Regardless, you spent all that time making it, so why wouldn’t you want to show off all the hard work and be left with an elegant, stunning shawl? Lace needs to breathe, to be opened up. This is achieved by wet blocking.
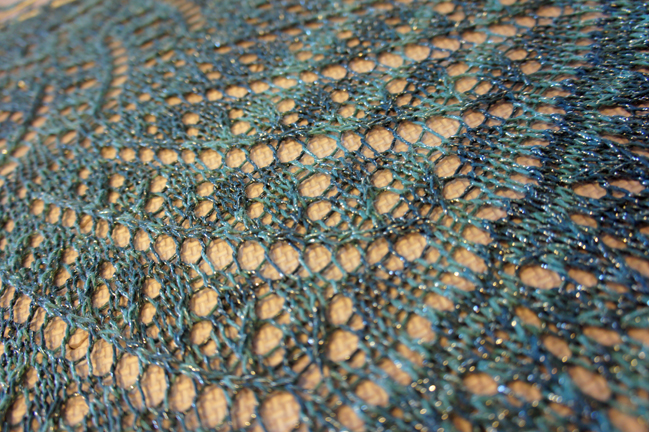
There are two main types of blocking… Wet or steam. Today we’ll be talking about wet blocking. I knit the Trousseau shawl by Carol Feller using a rayon and metallic blend and now I’m ready to block it! I did not weave my ends in yet and will do so post-blocking.
You’ll need: your lace shawl, blocking wires, pins, blocking board, large bath rowel, basin, Soak, cold water and a timer.
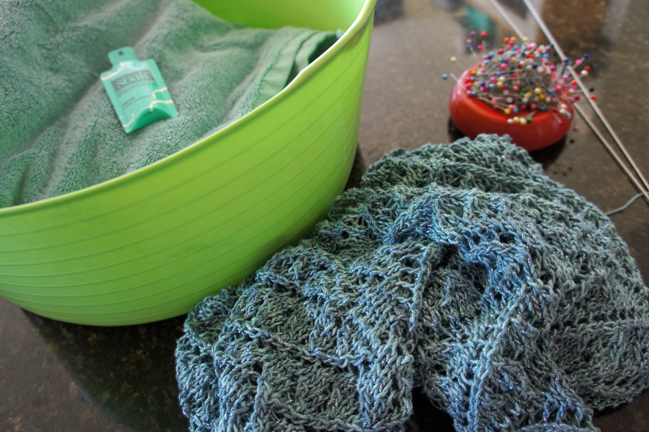
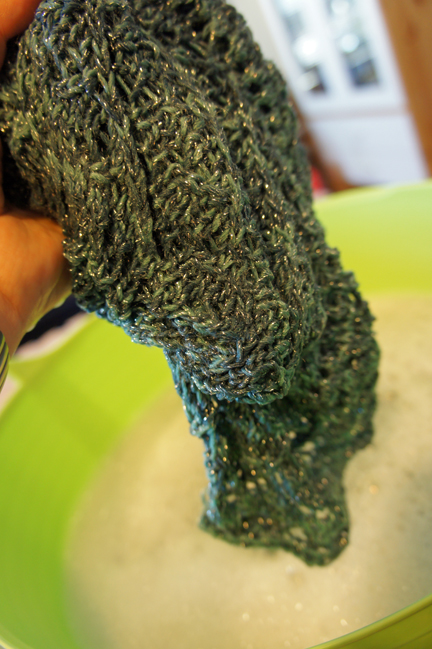
You want to use a basin that is super clean and has no cleaning residue (like the bucket you use to clean the floor with would). For smaller items, you can even use a clean cooking pot, or clean your sink and use that (just rinse it well to get the cleanser residue off). Fill it with COLD water and add a wool wash, such as Soak. Do not use Woolite, dish washing liquid or baby shampoo. These can rip the colors from your yarn, especially if it’s hand dyed. Cold water is very important because warm or hot water can felt your yarn if it’s an animal fiber (wool, yak, camel, angora, etc).

Set your timer for 15 minutes and walk away. You don’t need to stir or agitate the water in any way. Just leave it be.


When your timer goes off and it’s time to remove your shawl from the water, you want to be very careful not to wring out or twist your wet knitting. Doing that can pull your stitches and make them all wonky. I squeeze the excess water out by kneading it like bread dough.
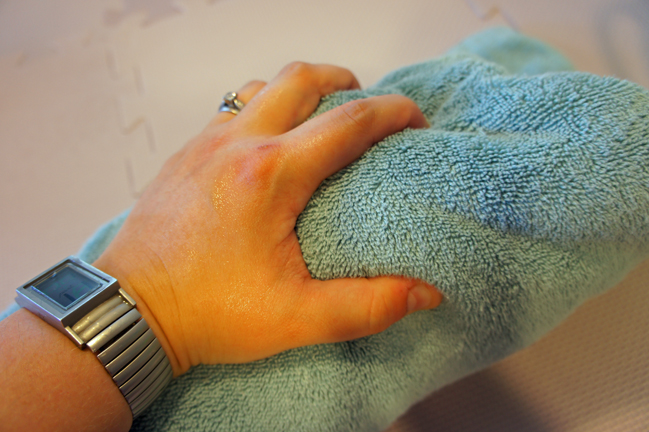
Wrap it up in a big bath towel and squeeze even more water out. Some people like to stand on it, but using your forearms and hands to squeeze it is fine.
Take it out of the towel and lay it flat on your blocking board or floor. Depending on the fiber you’ve used, your shawl may have almost doubled in size! I used a rayon metallic here, so mine won’t grow too much. Keep in mind that if you’re blocking on your floor, do it in a place where no animals, children or significant others may disturb it. If you’re blocking on the floor, be sure to lay a towel down because yarn can bleed.
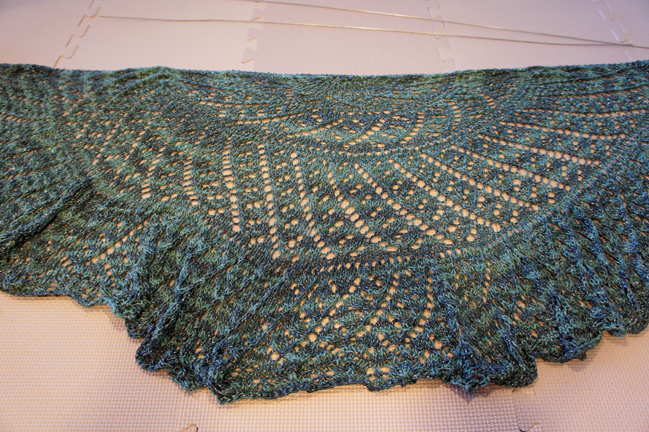
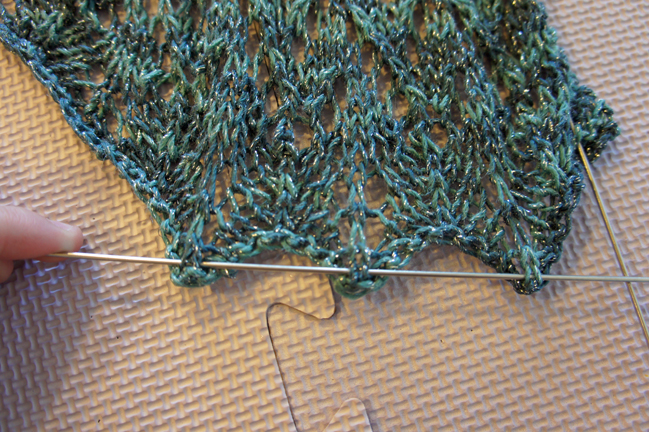
This is the fun part! Grab your wires and pins. You want to weave your blocking wires through the top edge. Most of the time (not always the case!) the top edge of your triangle shawl will be a flat line. You’ll weave the wires through the yarn overs as evenlly as possible across the top. I almost always need 2 or 3 wires to get across the entire top edge. It’s fine to have them overlap and better to overlap than have stitches fly off the ends.

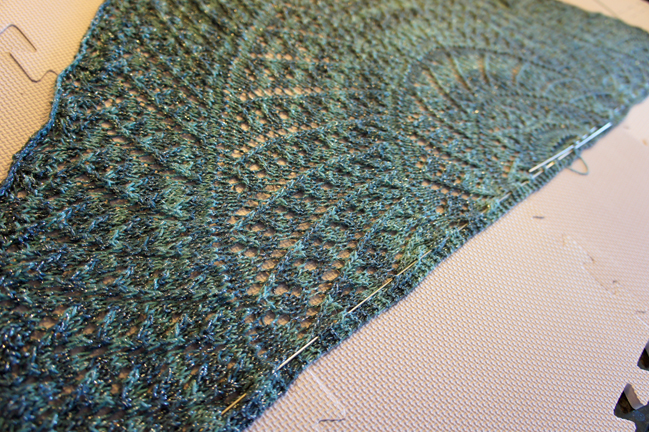
Now you’ll take your other wires and work your way around the lower edges. It’s common to have a triangle shawl with 3 very straight edges, but the one I’m blocking has a circular edge. The concept is the same! I want to pull out my edges to get a very sharp scallop. I’ll go in and grab the one stitch between 2 YO’s and pull out that one.
If you’ve got those 3 straight edges, you’ll probably be able to use 2 more wires on each side. If you’re going for a circular edge, like me, you’ll probably need 5 more wires. Go ahead and get all your wires in then we’ll pin them down.
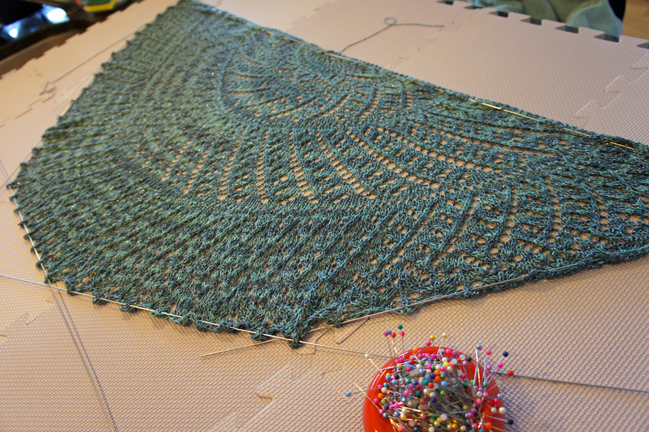
Start by pinning down your top edge, placing pins against the wire about 1-2″ apart, then pin across the bottom edges.
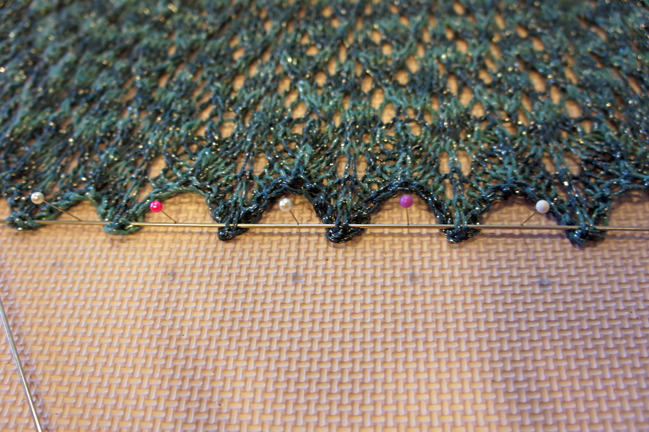
Sometimes you need to readjust your pins after everything is set in place. This is when you want to fine-tune the shape and the tension on the wires. Make sure that beautiful lace is opened up as far as it can go!
Voila! A blocked shawl!

I like to put a fan on my wet knitting to help it along, especially in the summer. Leave your blocked item out for a minimum of 24 hours. Depending on what you’re blocking, sometimes you need to flip it and block it on the other side for an additional 24 hours. Even if it feels dry (laceweight dries very quickly) leave it for a day to be sure. Sometimes the core of the fiber is still wet and your item will shrink back down if not given adequate drying time. Once it’s dry, weave in your ends and you’re good to go!
This type of blocking works best for non-fitted garments, such as shawls, blankets and afghans, cowls, scarves and bags. If you want to block a fitted garment, like a sweater, hat, mittens or gloves, you’ll want to steam block. Stay tuned for that in an upcoming post!
Now go get blocking!
XOXO, Tanis
